")

Instagram Reels have taken over Instagram in the last year, similar to TikTok, you can now create and share short, entertaining video clips. This feature will let you shoot, edit and put together clips to create a fun video, up to a minute long, which you can share with anyone on the social media platform.
Why should I use Instagram Reels for my business?
When a new feature is rolled out on any social platform, they give priority to the content that’s using it. Users are seeing a higher reach and engagement on their Reels than other Instagram content, even when using the same or similar content in different ways.
They are quick to make and quick for viewers to consume, which means viewers can get to know you or your business and brand without investing loads of their time. Reels are permanent content unlike stories, and are a very valuable asset if you’re looking at a content marketing plan.
What are Instagram Reels?
Reels are a type of Instagram video content. You can add a number of different effects to personalise your Reel, and there are lots of trends to follow for the content itself. Each Reel has a time limit of up to one minute, and you have the option to upload original audio files to play alongside your video. Other users can even reuse your audio and you can also choose to use audio from your favourite Reels.
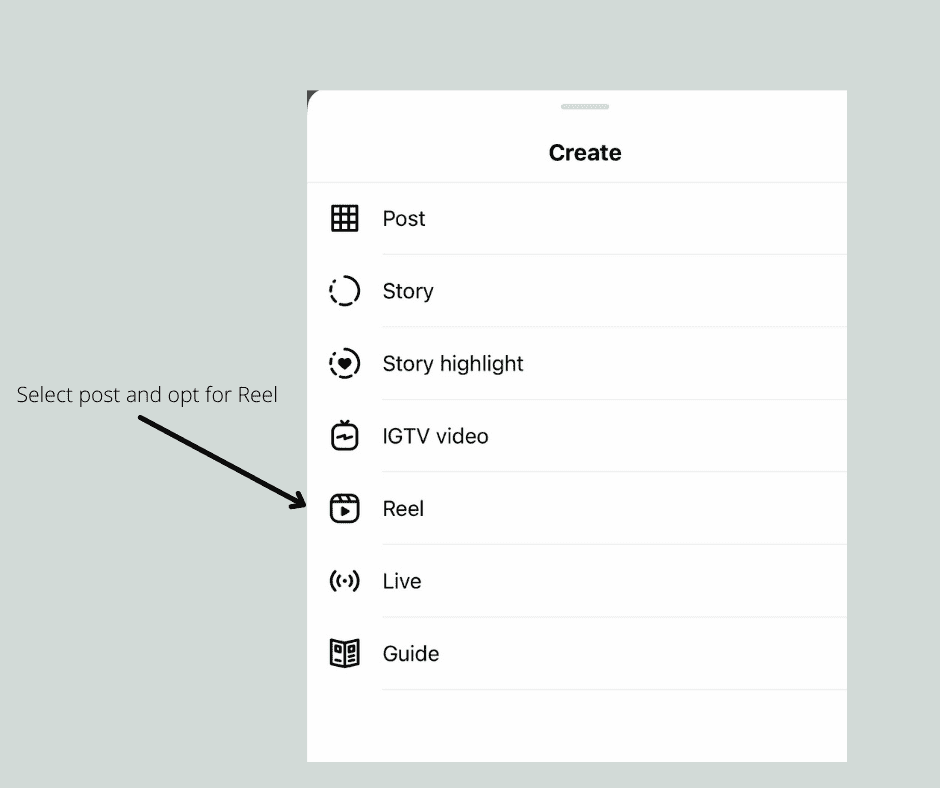
How do I make a Reel on Instagram?
You don’t need to download any additional software, you can simply make your own Reel by heading to your profile, tap the + symbol and choose Reels.
You’ll then have two options when creating footage – you can either press and hold the record button to capture footage within the app, or you can choose to use an existing video from your camera roll.
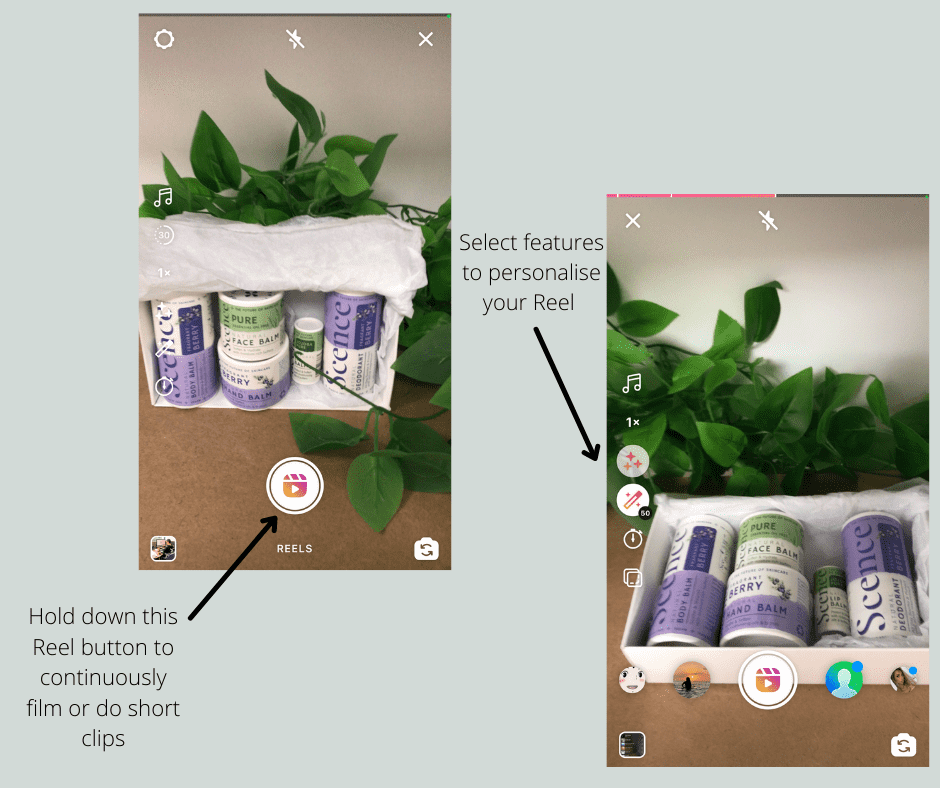
There’s a number of unique tools to use in your Reels – there’s a timer to help you record clips hands-free and a countdown button that will activate 3 seconds before recording starts, to help you get into position. You’ve got speed tools, to help you slow down or speed up clips, loads of fun AR effects and a tool to help you piece together all your clips to create awesome transitions.
Share your Reel
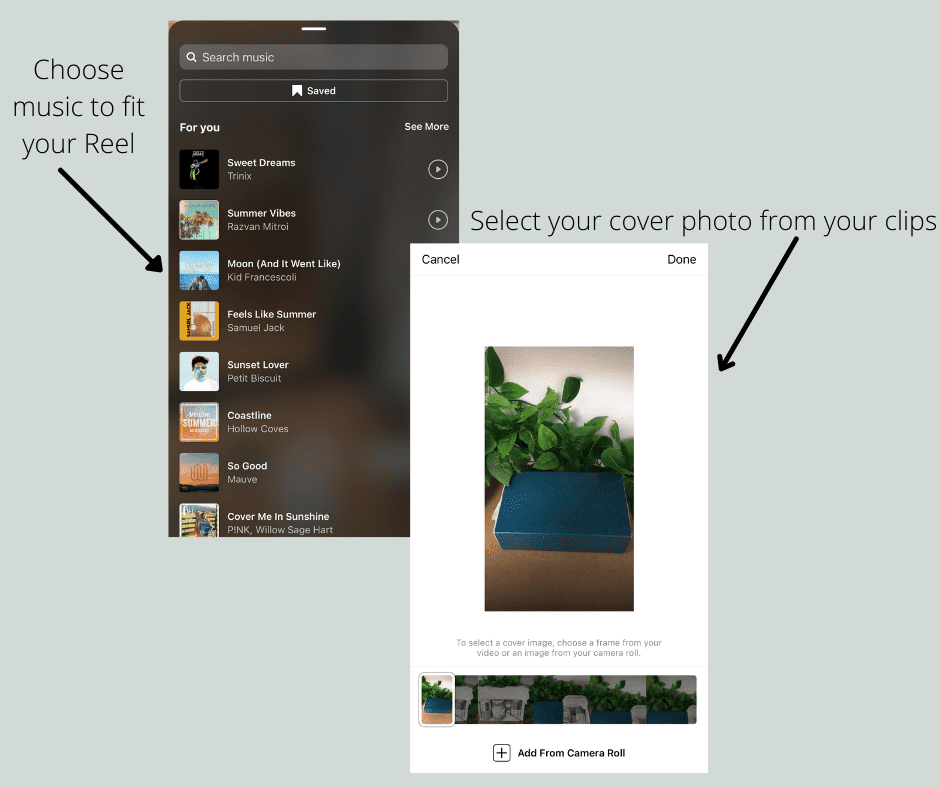
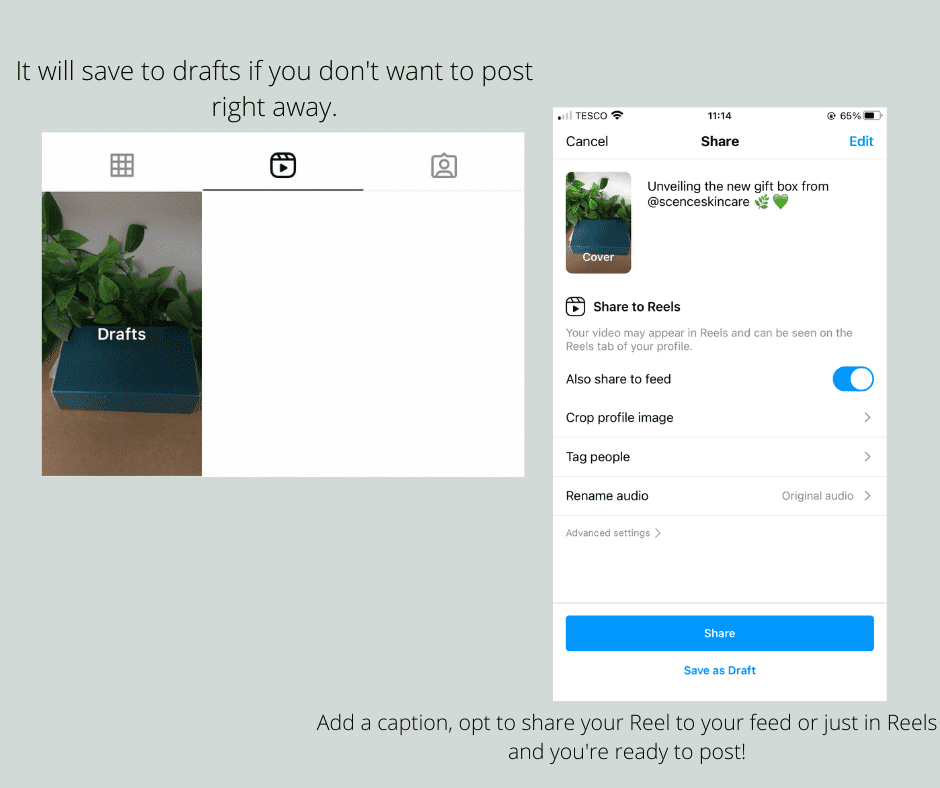
Sharing a Reel is really easy, when you’ve finished editing, just select the Next button and then you’ll see the Share page. At this stage, you can set a cover either by choosing a thumbnail from your reel or uploading an existing photo from your camera roll. You can also add a caption here.
When sharing your Reel, you can either add it to your Instagram Story or upload it to your Feed. If you add it to your Story it’ll be permanently deleted after 24hrs, but if you upload to your Feed it will be saved and visible to your followers on your profile and accessible in your Reels tab.
If you’re posting on a private account, your Reel will only be visible to your followers on their feed, if your account is public you can either share exclusively to your Feed or choose a place on the Explore Page. If you’re looking for the most amount of views, Instagram recommends the Explore option. If you don’t want to post your clip straight away, you can always save your Reel as a draft instead.
Watch other users Reels
It’s always good to watch other users’ Reels to get some inspiration and see the different ways they’ve been made. Scroll down your feed and look out for the Reels icon on posts or head to your Explore tab to view new accounts, there’ll be a new reel at the top and as you scroll down more will appear. Featured Reels that are promoted and chosen by Instagram will have their own distinct label. Or you can discover new Reels by clicking on the audio name or hashtag of an existing Reel to view other Reels that use the same audio clip.
Step-by-step guide on Instagram Reels
- Once you’ve opted for Reels, press the timer if you’d like to create multiple clips in your Reel, then you can set how long you want your first clip to be – 0.1 seconds to 60 seconds.
- If you want to apply one of the Instagram AR effects to your new video, you need to make sure you select this effect before recording.
- You can add audio before or after you record/upload your first clip, just select audio and select your favourite sound and press apply. You can trim down the audio if you only want it to play for a section of your video.
- To play around with speed you’ll need to have your first video clip ready – Tap 3X or 5X to slow things down or 2X or 3X to speed things up.
- The Align button will only show to users that want to use more than one clip in their reel. When you create your second clip, you’ll be able to position it carefully to follow on seamlessly from the first clip. This is really important if you want to line up audio correctly or magically switch your outfit in a flash.
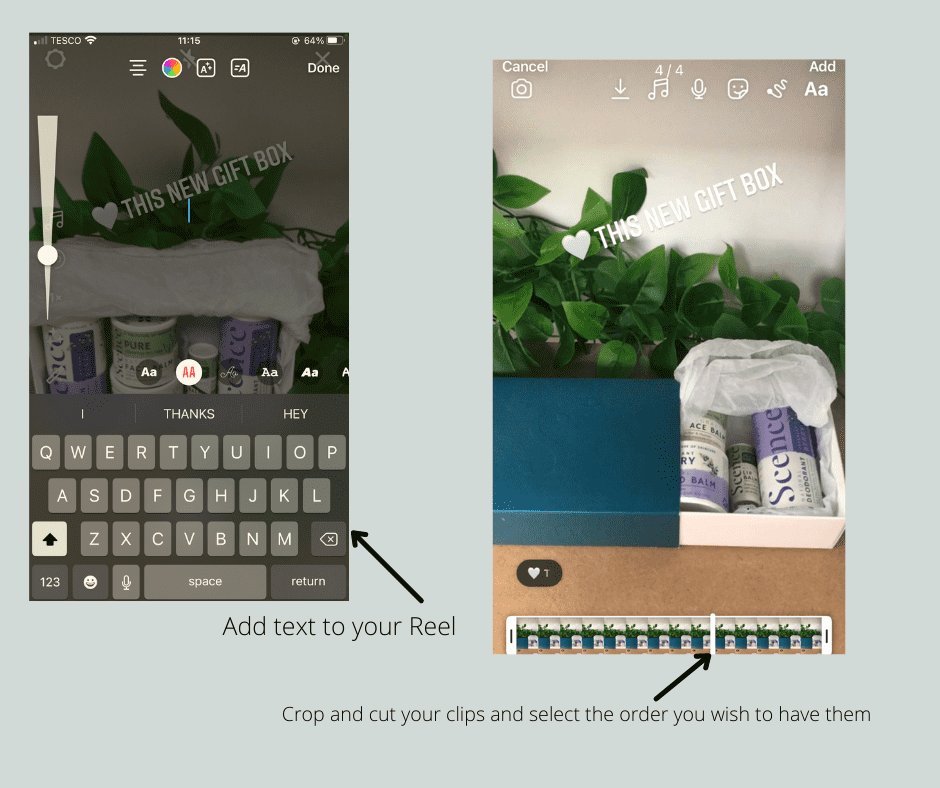
- To delete or watch a clip, just tap on it and use the editing tools.
- Once you’ve completed your video clip, you’ll be able to add text, stickers and annotations.
So there you have it, a basic guide to creating an Instagram Reel for your business. If you’re interested in strategies on how to grow your Instagram account check out our top tips in this video, and if you want to find out how The Fastnet Agency can support your Instagram content, get in touch to discuss our packages.